| Filed in Blog, Norway, Road Trips | Disclaimer: I use affiliate links and may receive a small commission on purchases. | Leave a Comment
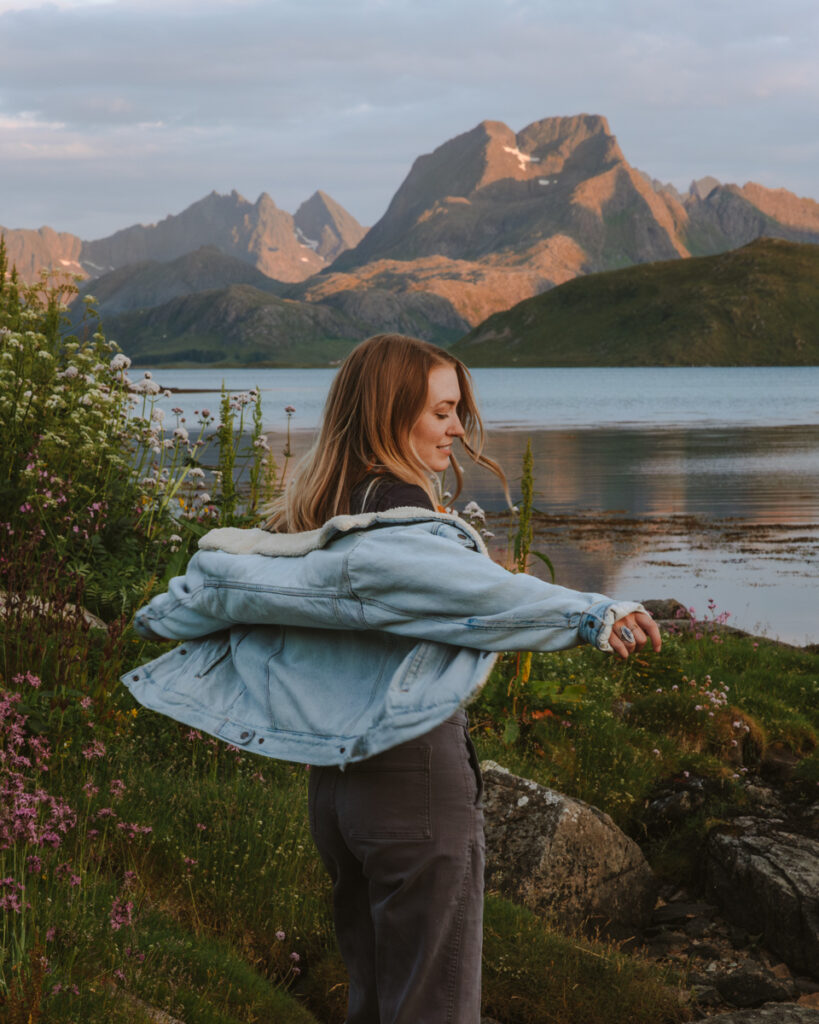
The Lofoten Islands of Norway are an incredibly unique and special place to visit. This archipelago sits at the very top of Norway in the Arctic Circle with some of the most stunning and dramatic views I’ve ever seen. Made up of 7 main islands, Lofoten is only about 155 miles total of road. Making this perfect place to try out Vanlife in Norway or exploring by car. I spent around 10 days exploring the best sights, Lofoten hiking, camping, food and more to create this Lofoten Road Trip Itinerary you definitely don’t want to miss!
My travels focus mostly on outdoor adventure. You can also see so much stunning landscapes and fjords without hiking, so I will be covering both hiking and non hiking destinations in this post.

- How to Get to the Lofoten Islands:
- Getting around Lofoten: Renting a Car in Norway
- Lofoten Road Trip Itinerary: Vanlife and Hiking Lofoten Islands
- 1. Reine, Norway
- 2. Monkebu Loop Backpacking and Hiking Lofoten Islands
- 3. Fredvang
- 4. Ryten Hiking Lofoten
- 5. Nusfjord
- 6. Skårungen AS Basecamp near Svolvaer
- Optional Add-On: Senja, Hesten Trail
- Norway Vlog:
- Best Time of Year to Visit
- Vanlife in Lofoten
- Packing for Lofoten Road Trip:
- Other Norway Destinations:
- Conclusion: Lofoten Road Trip & Hiking Lofoten Islands
Photos in collaboration with Disa Wold
How to Get to the Lofoten Islands:
Getting to the Lofoten Islands is relatively easy, but does take up a travel day! We flew from Norway’s Capital, Oslo, to the Leknes Airport (LKN). The flight is around 2.5 hours with good weather. We were traveling during the summer months of June/July, so we had no issues getting there and back.
I know some people rent a car in Oslo and make the LONG haul up to the Lofoten Islands by car. If you love driving and want to endure a 20 hour, 840 mile drive, that is definitely an option. I know there are many scenic stopping points along the way, and I would love to make that trip one day.
Getting around Lofoten: Renting a Car in Norway
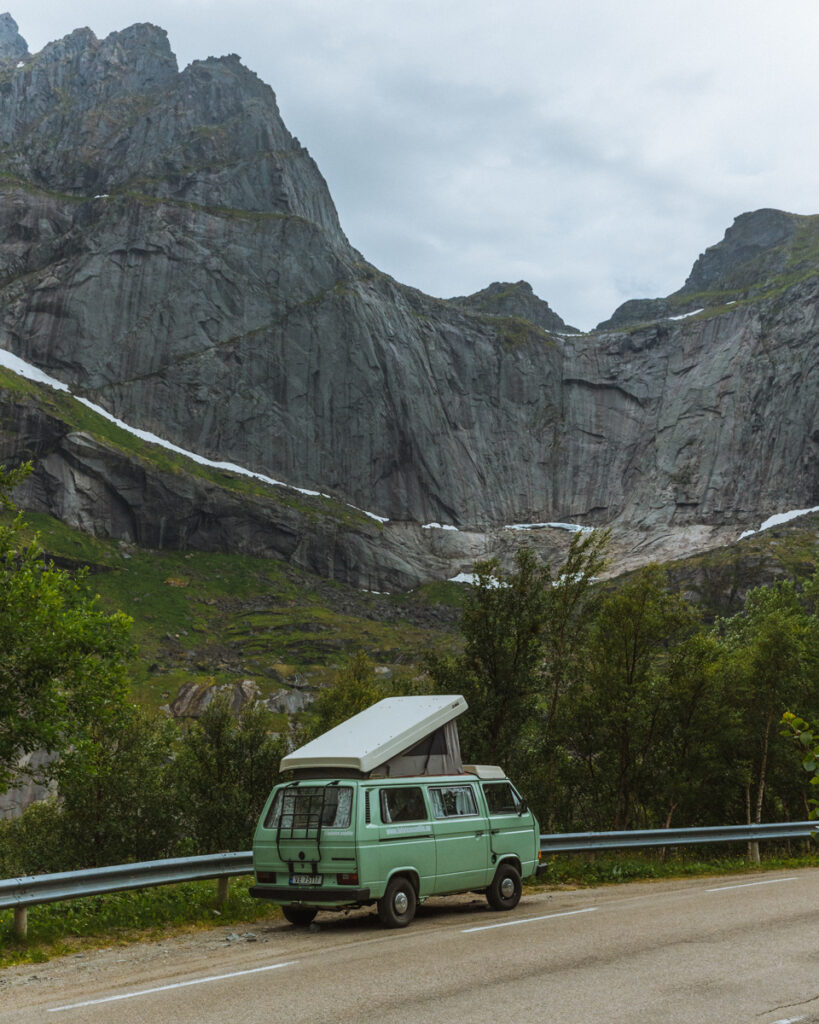
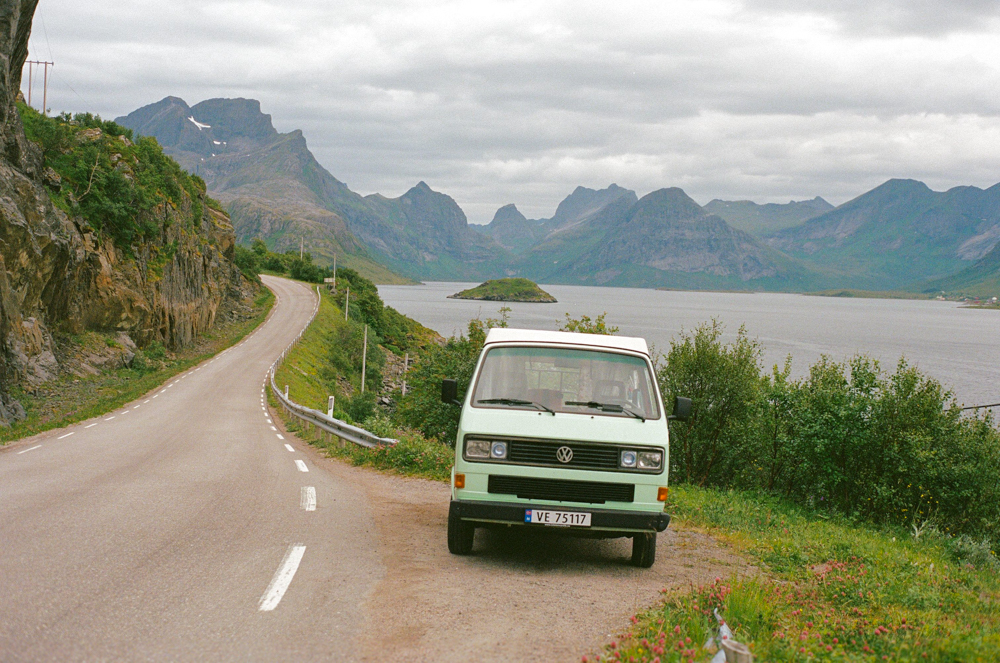
For this itinerary, we rented a standard SUV for 2 days, and an 80’s Volkswagen van from Lofoten Vanlife for the remaining 8 days. Things to know about renting a vehicle in Norway:
- As of 2023, an international drivers license is NOT needed for USA citizens as long as you have a valid drivers license. This made renting REALLY easy and saved us a trip to the DMV. Always check for yourself in case this has changed!
- The steering wheel and driving lanes sides are the SAME as in the USA.
- You do NOT need anything fancy. There were no situations where we needed AWD of 4×4 or even any amount of clearance for this itinerary. A standard car will work just fine.
- Be prepared to pay extra for automatic transmission! I would love to learn manual transmission just to save some money on these international trips. Double check when you’re booking so that you aren’t trying to learn stick shift in a parking lot in Norway hah!
- Prepare for VERY narrow roads throughout the Lofoten Islands. It was totally fine in the SUV, but driving the VW van on them definitely made my blood pressure go up some days.
Lofoten Road Trip Itinerary: Vanlife and Hiking Lofoten Islands


1. Reine, Norway
Reine was our favorite small town in Lofoten. If you get into Leknes and pick up your vehicle at a reasonable time, I recommend heading straight here! Luckily the Lofoten Islands are small and it is only about an hour to the very end of the road in Å.
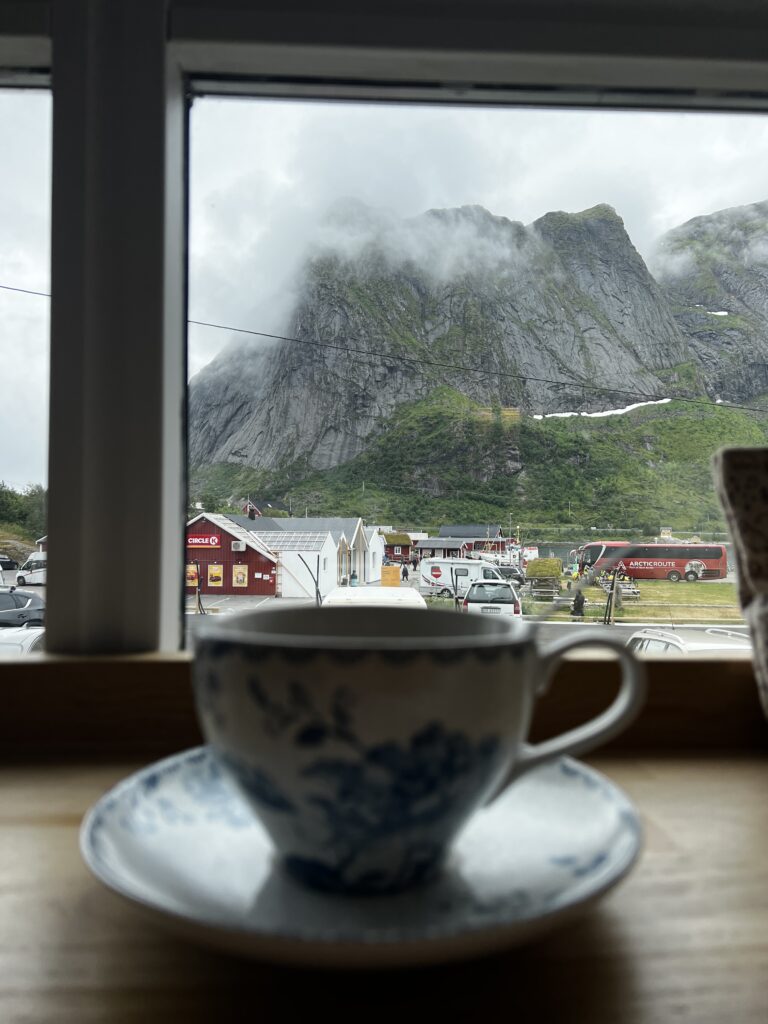
Bringen Kaffebar
We spent an embarrassing amount of time at this cafe. The views are incredible, and there are good places to work inside. I ordered a different tea everyday and loved the pastries and breakfast foods. Enjoy your coffee while staring at the towering view of Reinebringen.
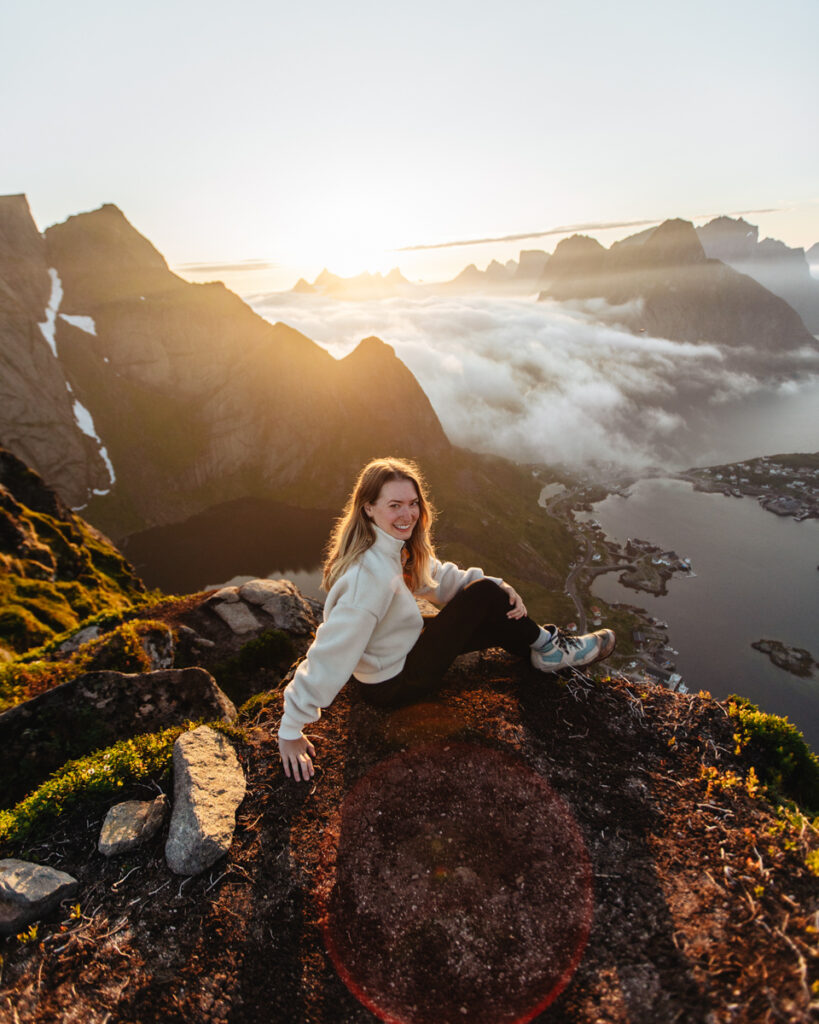
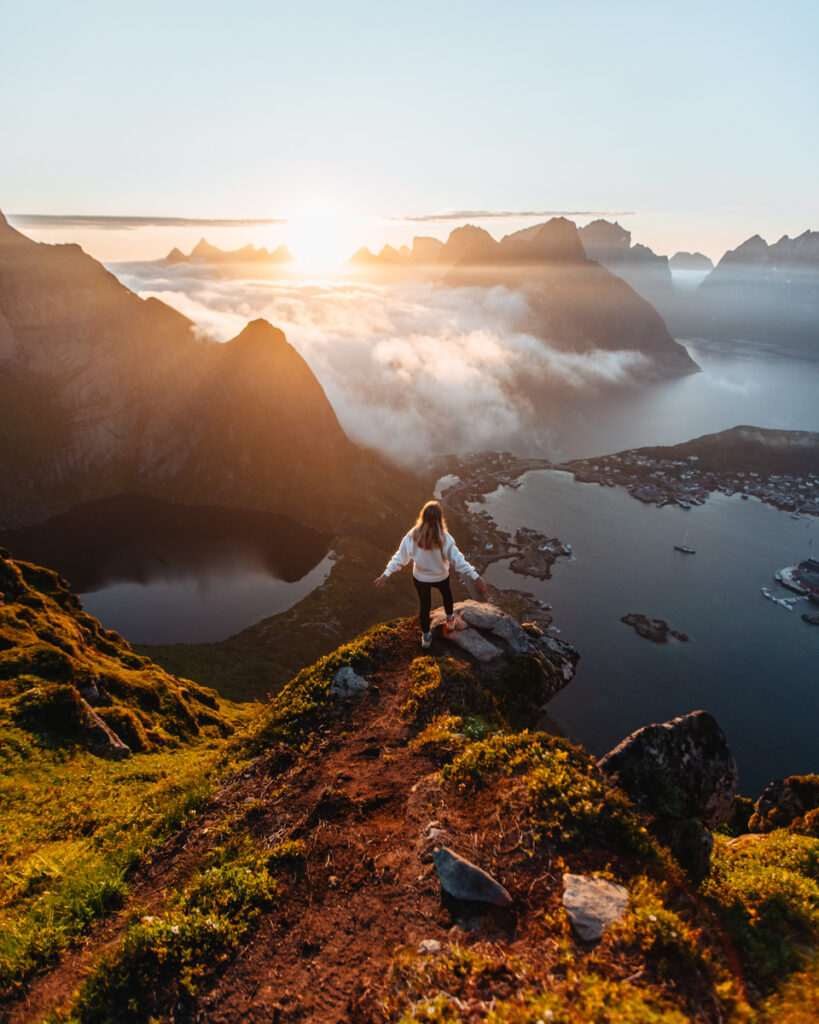
Hike Reinebringen
This hike is NO joke, but truly a must-see if you are physically able.
The stats are 3.6 miles round trip with 1,814 ft elevation gain. So yes, that is 1000 ft elevation gain in roughly one mile. YIKES. It is a very nice trail with stairs to make it much easier. Prepare for it to take you roughly 3 hours total for the entire experience. I promise, the views are worth the 1,566 steps.
Tip: if you are visiting during the summer months the sun does not set (if at all) until very late. I highly recommend hiking at night to avoid some of the crowds this place sees. We started the hike at 9pm and experienced incredible conditions at the top. Bring layers, as it gets windy at the top!
Visit Reine’s Wooden Bridge
This is a lovely spot for photography in any season. Most famously known for capturing northern lights behind the mountain in the Fall and Winter months. Note that there is a sign posted that it is a private drive. No parking is available here. We parked at a pull off on the main road to respect this.
Enjoy the Picturesque view of Reine
When you turn off of E10 into the city of Reine, you’ll likely see a crowded area with a stunning view of this historic fishing town. I highly recommend snagging a photo here. Parking is again a hassle. I recommend leaving your car at the gas station or cafe and walking the short distance to get here.
Reine makes for a GREAT basecamp. It is extremely scenic and close to so many places on this itinerary. Nearby Accomodations:
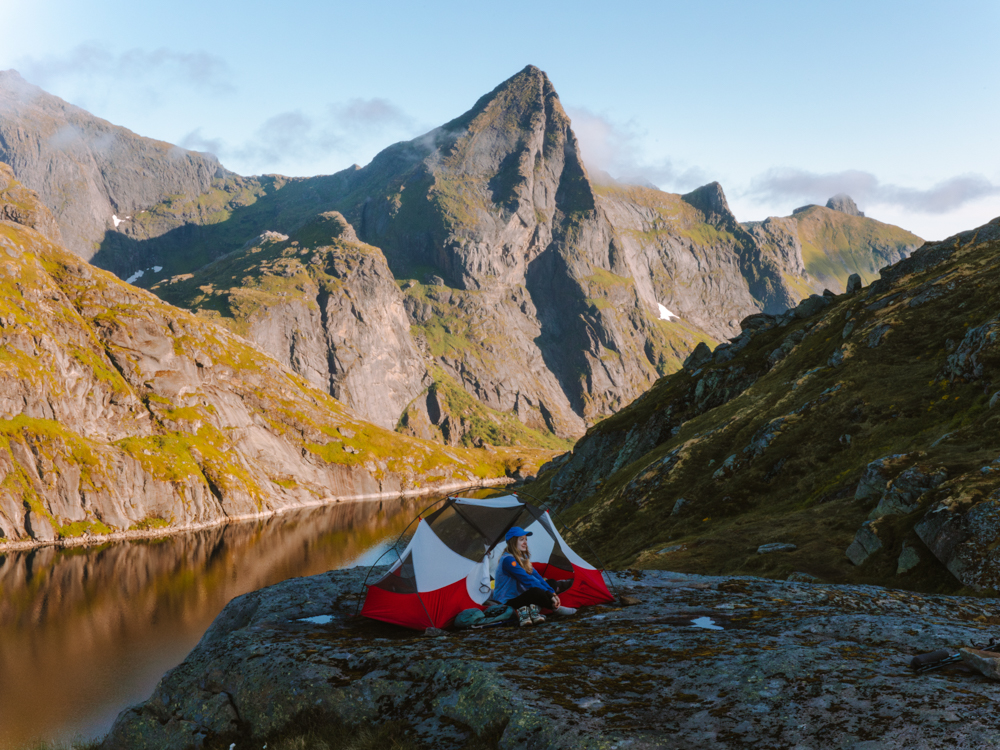
2. Monkebu Loop Backpacking and Hiking Lofoten Islands
This was our first backcountry experience in Norway and it did not disappoint. We found Monkebu trail because of the backcountry cabins that are typically available for rent there. Unfortunately it was closed while we were there and possibly for the foreseeable future, but regardless it was a gorgeous place to pitch a tent.
Only about a 15 minute drive from Reine, this short, but steep hike packs in loads of views. It is unique in that it has a section with chains to aide you in your climb up. It is not technical in any way, but with a heavy backpack, it sure was challenging.
Things to Know:
- 6.5 miles round trip and 2,000 ft elevation gain
- Can easily be done as a day hike if you do not plan to backpack
- Costs 50kr (roughly $5 USD) at trailhead parking lot. Come prepared with cash, unless you have the app VIPPS, but we couldn’t figure out how to use it with American accounts.
- There are many places to pitch a tent. We camped near the cabin and there were four other tents when we arrived.
- There is no shade. Come prepared with sun protection. We were luckily hiking during a moody day.
We brought all of our own backpacking gear. I will discuss this and other options later in this post.
3. Fredvang
Fredvang is known for its two cantilever bridges that connect fishing towns. There is an iconic peak in the backdrop that makes this area especially stunning and is absolutely worth checking out, even if just for a quick drive out. There are a few pull offs here that were great options for camping as well. We took some of our favorite photos in this area, and if you’re into drone photography, this area is a must.


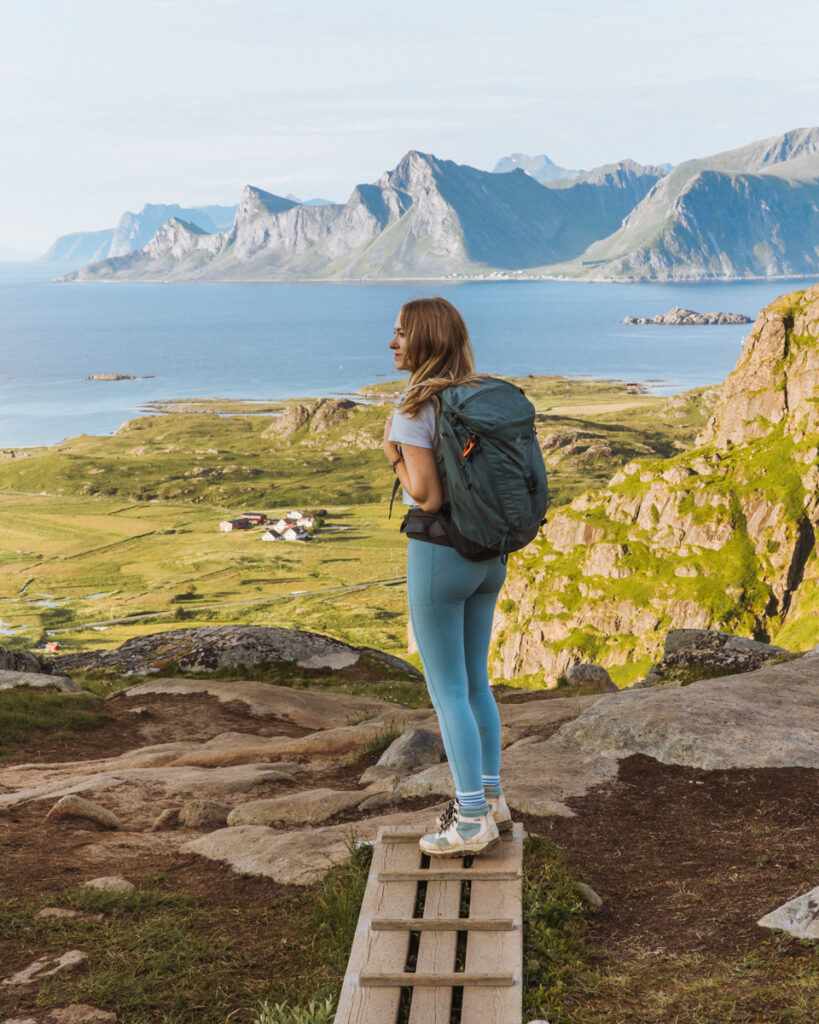
4. Ryten Hiking Lofoten
This iconic hike is near Fredvang and offers views of Kvalvika Beach and the Fredvang bridges. The bright turquoise blue water made me think we somehow transported somewhere tropical. The was one of my favorite hikes on this trip.
It is VERY popular. Parking lots and camping have been developed in the backyards of residents near the trailhead. Parking for the day cost $10 USD and I think camping is around a similar price. This was another hike where we decided to hike it at night during the midnight sun to avoid some of the crowds. There were still a few people on the trail, but significantly less than had we gone during normal hours.
This hike is known as a mini Trolltunga because of a rock that juts out that has become an iconic photo spot. Bring lots of layers! It got very windy for us and I was glad I had warm layers to wait it out.
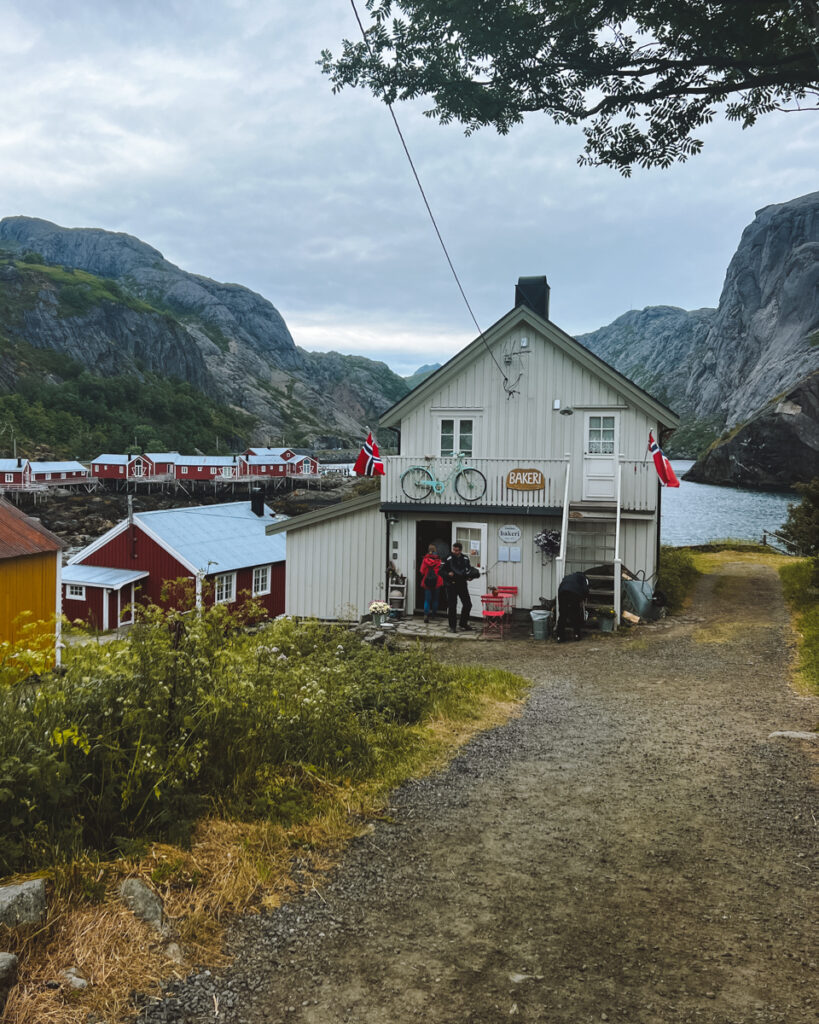
5. Nusfjord
Nusfjord is home to the Nusfjord Arctic Resort and a historic fishing village that has SO much charm. See the classic red and yellow fishing cabins lining the fjord and dine on good (but expensive) food. We were lucky enough that our friend lives there and showed us around! You have to pay an entrace fee of 100kr ($10 USD) to enter, as it is essentially a museum with the buildings and harbor preserved as it would have been years ago.
- Do make sure you get pastries from the Bakeri
- Enjoy coffee and a vaffle at the incredibly scenic Landhandleriet Café
- Take a photo with the Kiss a Fish
- Visit the old sawmill
Accommodation: if you are looking to stay in the village you can rent out the historic fisherman cabins.
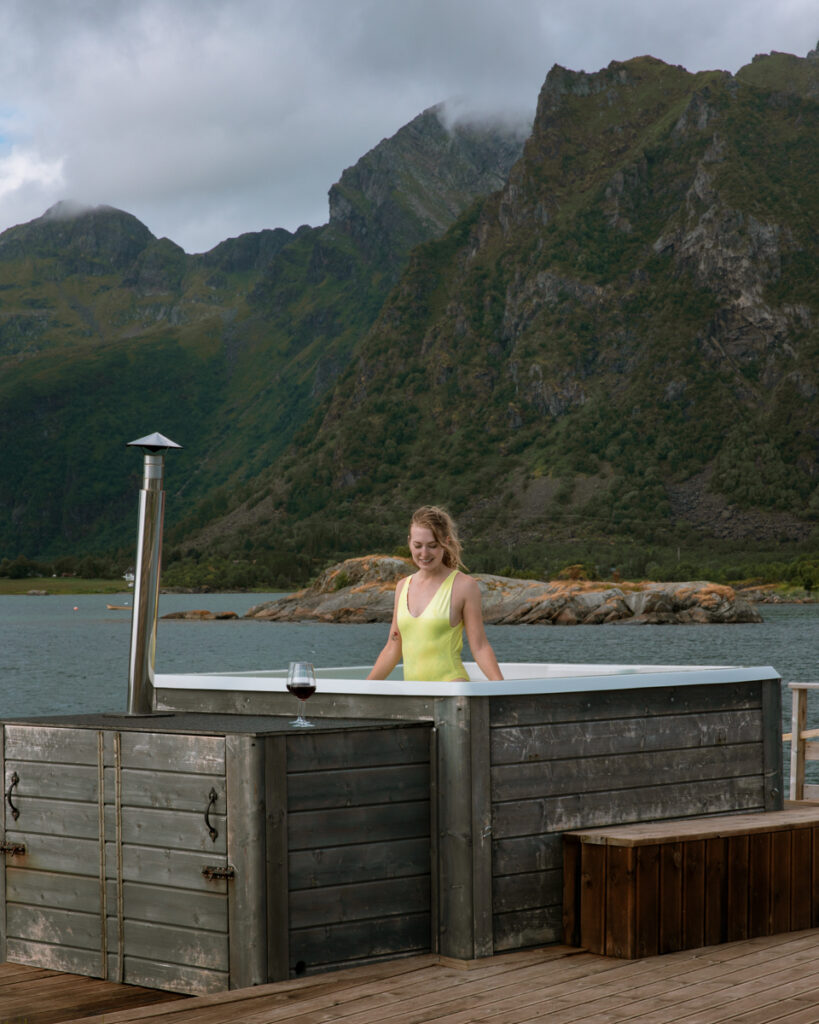
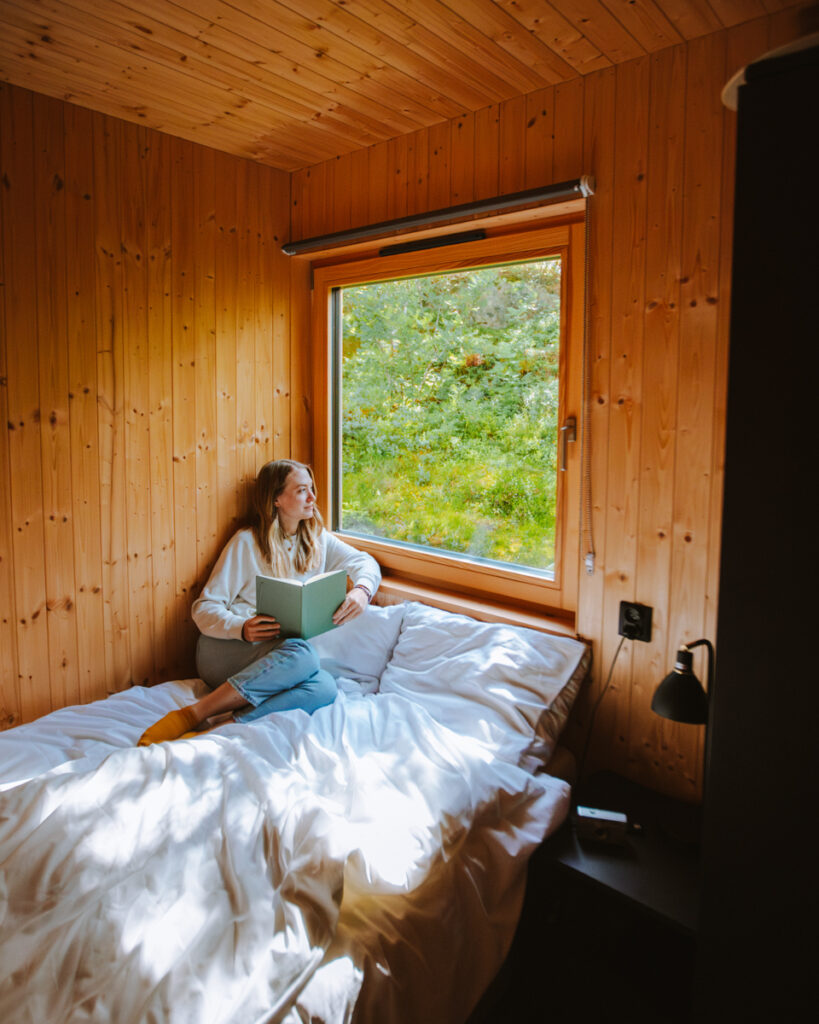
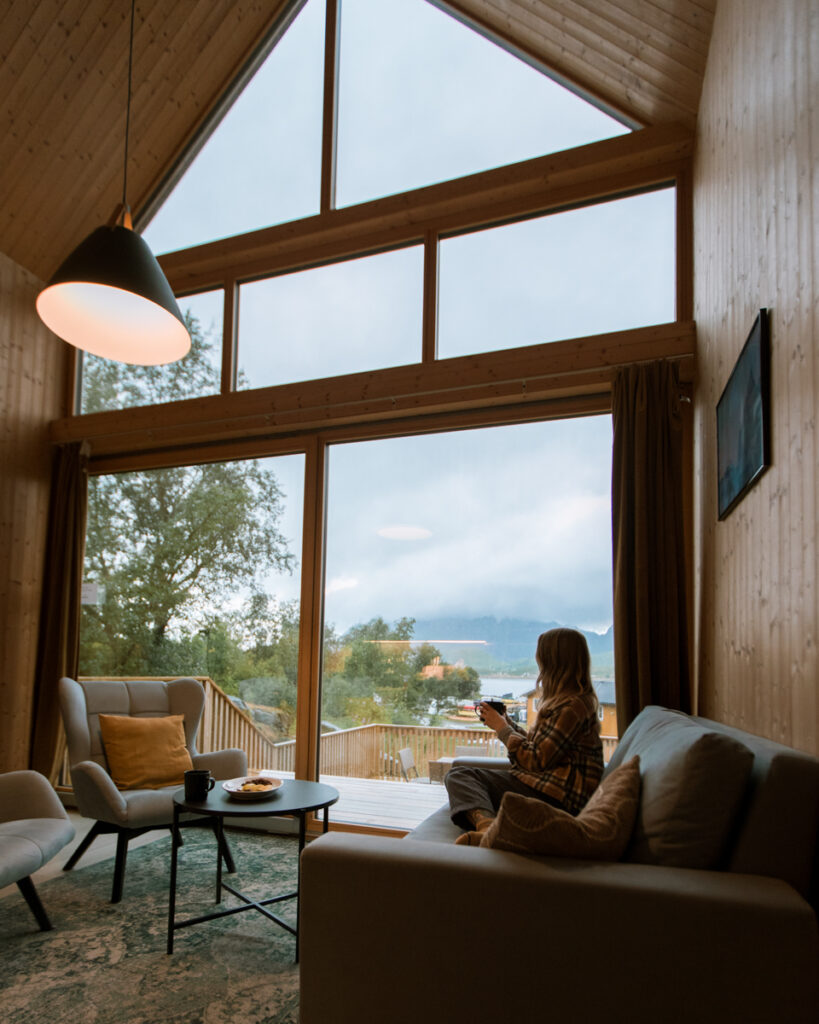
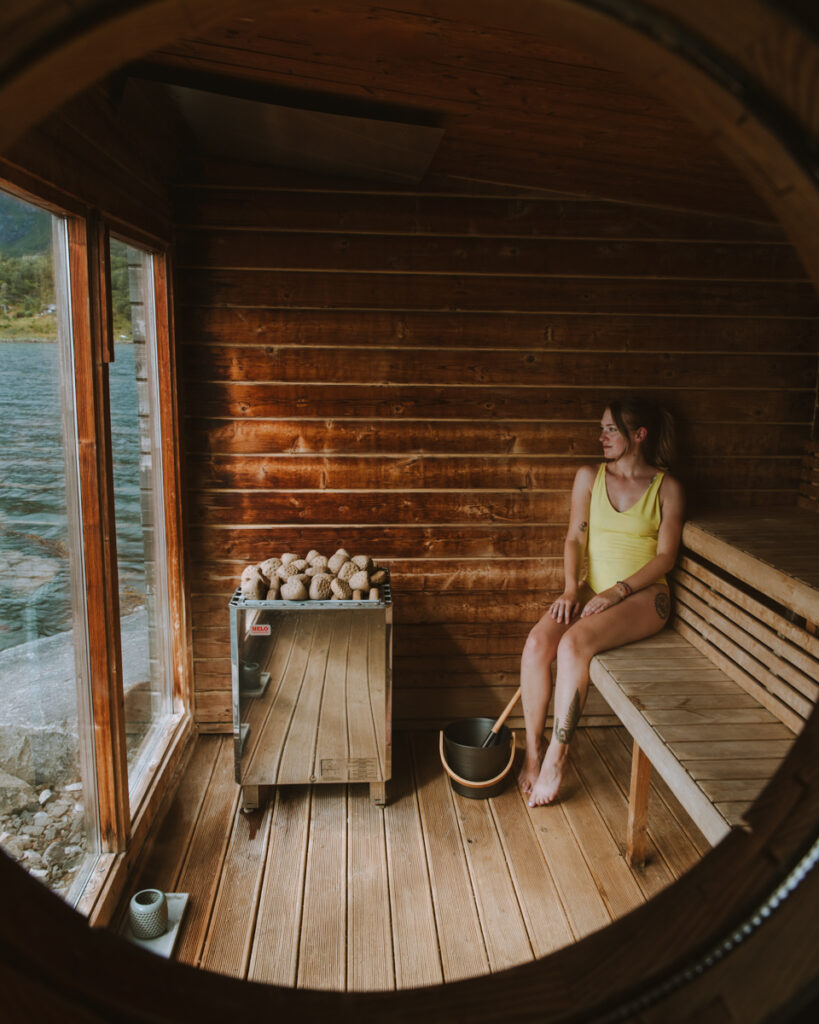
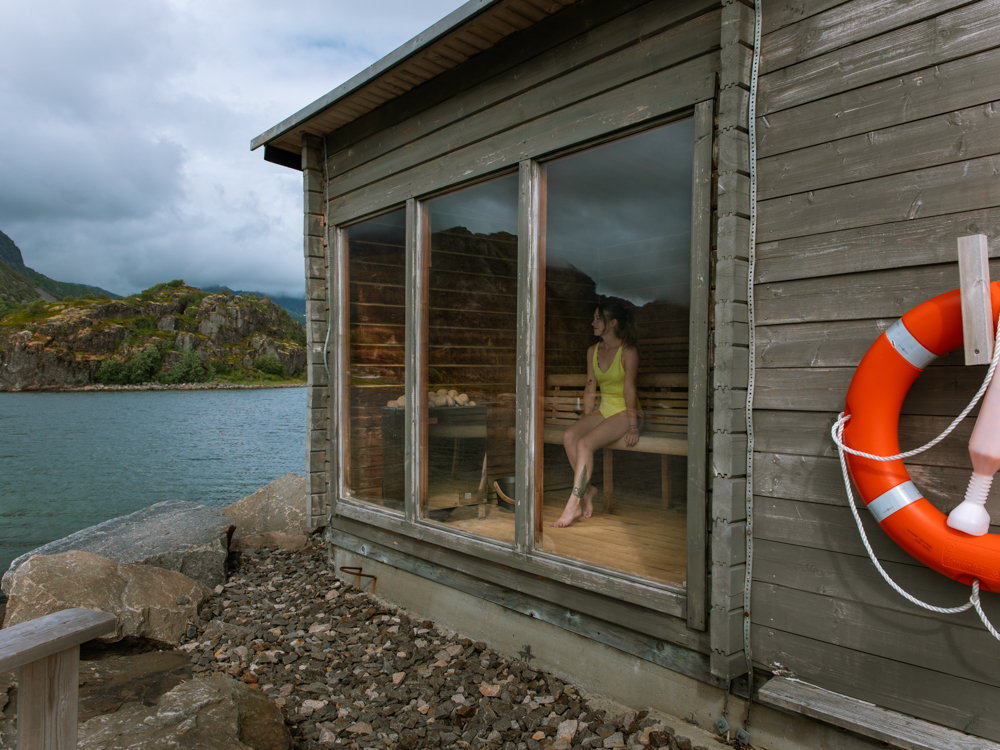
6. Skårungen AS Basecamp near Svolvaer
Since we had been living in a van for over a week, we wanted to end on a more luxurious and relaxing note. And Skårungen Basecamp was the perfect place. They have hotel rooms, cabins and camping, but we were ready for a very secluded space to rest. The cabins were pretty incredible.
The onsite restaurant had some of the best food we had on the entire trip. And if you’re a gin lover, they have a specialty menu of gin drinks made from gin in Norway and all over the world (as well as a standard bar).
But what was really the best part, is the onsite spa. The hot tub overlooks the water and mountain views and the sauna has an equally stunning view. Wine was brought out to us and it really felt like the best thing ever after backpacking and being packed into a small van. Now i just need to go back in the Winter to ski from here and to enjoy the hot tub while watching the Northern Lights.
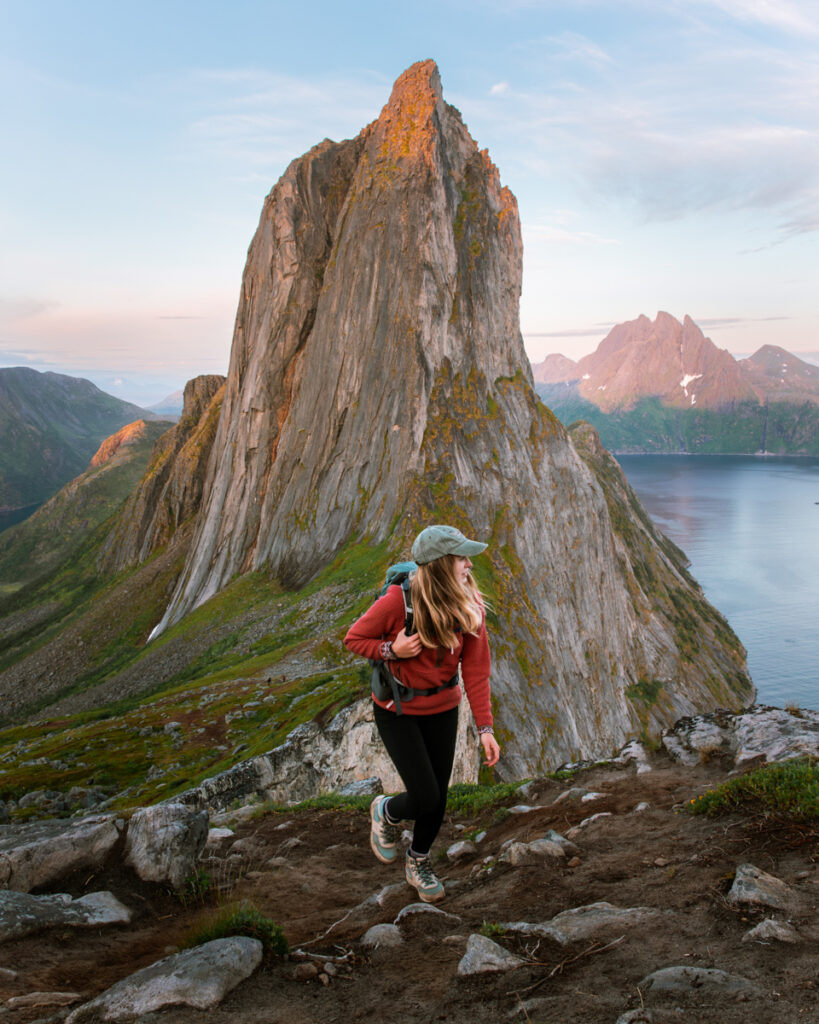
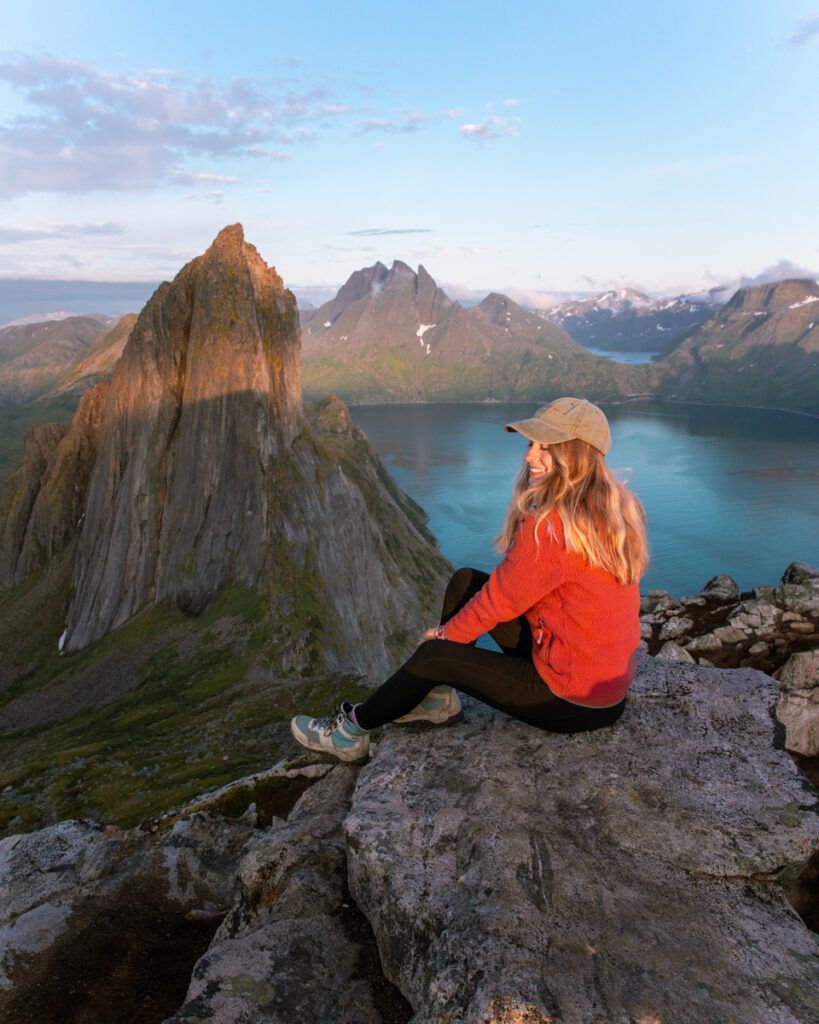

Optional Add-On: Senja, Hesten Trail
So, another destination that is nearby, but technically not part of the Lofoten Islands is the Island of Senja. A 6 hour drive from Svolvaer or 7 hour drive from Leknes, but by far the most impressive view of my entire 3 weeks in Norway.
We almost did not go because of the logistics of renting another car since our van could only stay in the Lofoten Islands radius. But wow it was worth it.
You can day hike or backpack Hesten/Segla. A short, but steep trail at 3.3 miles round trip and 1,800 ft elevation gain. This one definitely was challenging by the end of a long trip. Backpacking it really allowed us to take in the views. However, this trail is SO busy even during the middle of the night during the summer months. We barely slept because of how much foot traffic and drones were coming through. But I’d still do it again. It was just that spectacular.
Nearby Accomodation: Mefjord Brygge
Norway Vlog:
Check out my video from my 3 weeks in Norway!
Best Time of Year to Visit
When to visit the Lofoten Islands of Norway depends a lot on what you want to do. If you are not planning on going specifically for snow, skiing, northern lights – I suggest planning your visit sometime between late June and mid August. My trip was June 29-July 20th and we had incredible weather and loved getting to experience the midnight sun.
If you don’t know what the midnight sun is, it is a period of time in the arctic circle when the sun does not set, but rather moves horizontally along the horizon.
Lofoten Weather:
Lofoten weather reminded me a lot of Pacific Northwest coastal weather. Expect a mild summer with rain. We had a couple rainy days and were told that this summer was unusually nice. We had temperatures reach 70°F a few days. Winters are also milder than you might think for a place in the arctic circle. The average temperature in the winter is around 32° F.
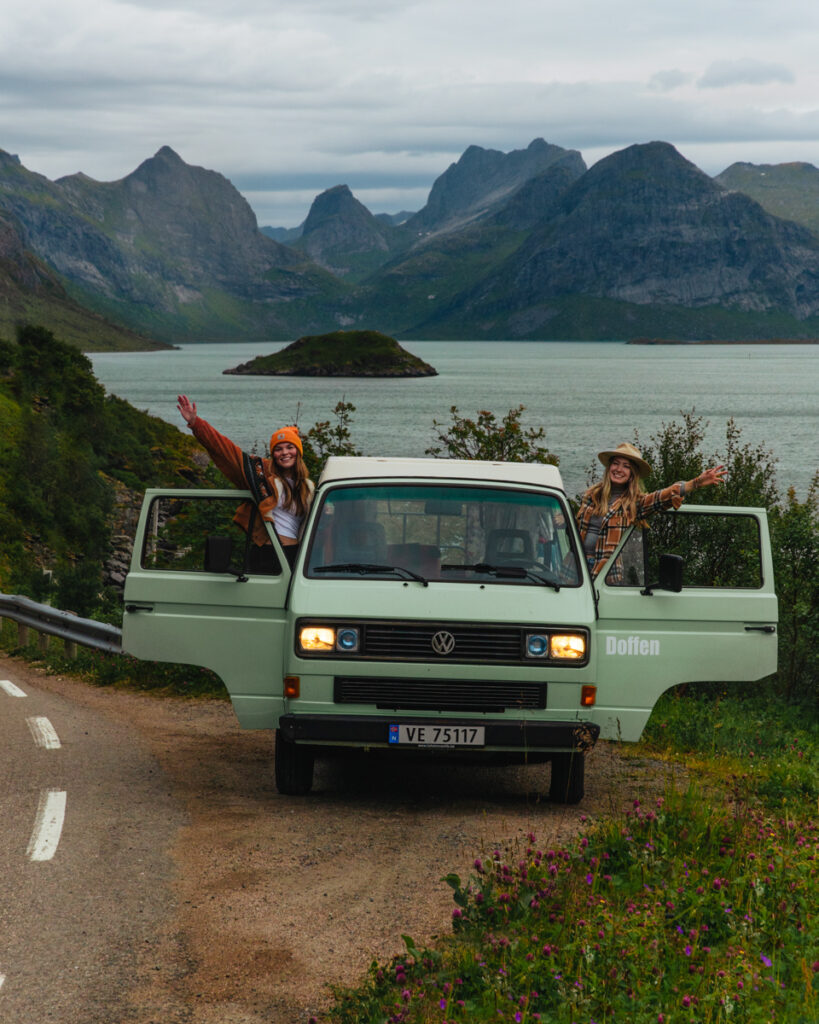
Vanlife in Lofoten
Renting a van is a great way to experience the Lofoten Islands in Norway. There are many Pros and Cons which I will outline here:
Positives of Renting a Van in Lofoten:
Cost:
Traveling to Norway is expensive. Especially during peak season with the best weather. While renting a van is expensive, it is a LOT LESS expensive than paying for hotels and a rental car.
It costs around $1350 for 6 nights in the van we rented from Lofoten Vanlife. Where a rental car for a week is about $600 minimum for 6 nights (without tax or insurance) and average hotels pricing you at $1,200 for 6 nights (2023).
Right to Roam Law
Norway has a really unique Law called the Right to Roam, meaning you can camp ANYWHERE as long as it is 500 feet away from private property, farm land, and occupied buildings or private campgrounds. You could spend every night at an incredibly scenic pull off if you’re lucky enough to get there first!
It’s cute
Okay, this one might not sell you on vanlife in Norway, but it sold me haha. As a photographer, having an aesthetic vehicle really added to my creativity in my photos and videos. It also created a lot of staring from strangers though too. But who can blame them when they see this mint green cutie?
Negatives of Renting a Van in Lofoten:
Bathrooms
I own a converted 1999 chevy express in the USA, so I am no stranger to the annoyance of finding a bathroom on the road. Norway does have some great public restrooms available, but just not near pull offs where you want to camp. I usually have no problem peeing behind my van at night. But factor in that it doesn’t get dark in Norway in the summer and we’re camping on the side of the road with 4 other vehicles- now we have a problem.
We ended up paying to stay at campgrounds most nights because of this. Most campgrounds ranged between $15-$40 USD per night
Finding a Place to Sleep
I mentioned the Right to Roam law above in the positives, and it sounds incredible! I had this idea that i’d be camped alongside a scenic fjord living out my European Summer dreams… but I guess so did everyone else.
We didn’t have interest in holding down a camping spot all day, so we took our chances with showing up to established campgrounds. If you aren’t there relatively early, you may be out of luck. Reserving ahead of time could have saved us a lot of trouble, but we wanted our itinerary to be flexible.
Another note on sleeping: The midnight sun can make it pretty challenging to sleep in a van. We had sheer curtains, but no form of blackout curtains like the hotels do. Come prepared with a sleeping eye mask.
Narrow Roads
If you aren’t use to driving a larger vehicle, this is something to think about. The roads in Lofoten are incredibly narrow and often have sections where only one vehicle can get through. This made driving around pretty stressful in some places, but was something we got used to by the end of the trip.
Packing for Lofoten Road Trip:
Packing for this trip was tricky. I had to bring a lot of gear for backpacking and hiking which can take up a lot of space. You can rent gear there, but honestly I had a really hard time finding places online that rent gear to you without a guide. The logistics of picking up and dropping gear back off really didn’t work well for our itinerary and would have ended up costing quite a bit.
- Backpack: I brought a backpack that was a good size for hiking but also could hold enough for an overnight. This 28 L Dueter bag is my absolute favorite. We opted for premade meals instead of bringing a camp stove/fuel along. This saved us some space!
- Sleeping Bag: It got pretty chilly up in the mountains, but stayed cozy in the van. I brought a 20 degree bag that compresses in a 13 L dry bag to the size of a volleyball.
- Tent: we used the MSR Hubba Hubba 2 person tent
- Sleeping Pad: I’m a huge fan of the big agnes sleeping pads. It’s incredibly compact, comfortable as a side sleeper, and is less noisy than a lot of pads i’ve used. This is about the size of a water bottle.
- Down Jacket: it was important to have a warm layer that packed up small. I love my Arcteryx Jacket, but it is very expensive. REI and Backcountry have great alternatives for less.
- Rain Jacket: An essential, as rain is always a possibility in the mountains. It also really helps break the wind at a summit. REI has some affordable ones I recommend here!
- Hiking Boots: I recommend waterproof boots with ankle support like the Danner 600
- Everyday Adventure Shoes: Having a pair of shoes I could wear on short adventures, but also looked cute to wear in the city was important to me for packing as light as possible.
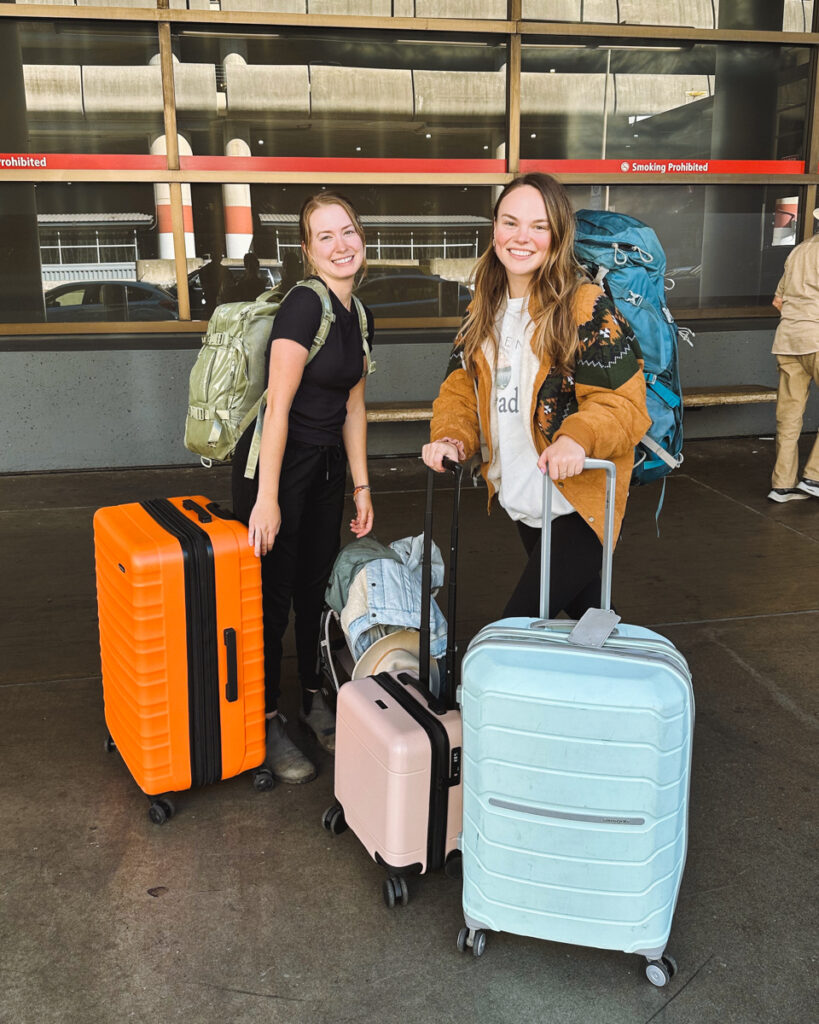
I brought a large 28 Inch checked bag that I was able to store my backpacking gear in, plus my clothing for the trip. I only had to pay for it being overweight once, which to me was better than bringing an additional bag. The size was not an issue for me. I then used the backpack mentioned above as my carryon bag with my toiletries, computer and camera.
Lots of campgrounds have laundry. I recommend packing minimal clothing and planning for a laundry day.
Other Norway Destinations:
Check out my other Norway blogs to extend your trip!
Conclusion: Lofoten Road Trip & Hiking Lofoten Islands
If I had to pick one area in Norway to revisit, it would 100% be doing another Lofoten Road Trip. There are endless stunning views, hikes and unique stays to keep me coming back.
I recommend at least 3 full days at the minimum, but ideally 5-7 days here. Lofoten Islands are becoming more and more popular, so I recommend planning that trip sooner than later!
What view stood out to you?
Share and Save for Later!


